Read The Tutorial:
To create a Solar Proof Project you need to Login to your Solar Proof account.
- Click on "Start"
- Enter the project address
- Design your system
- Proceed through project creation wizard
1. Click on "Start"

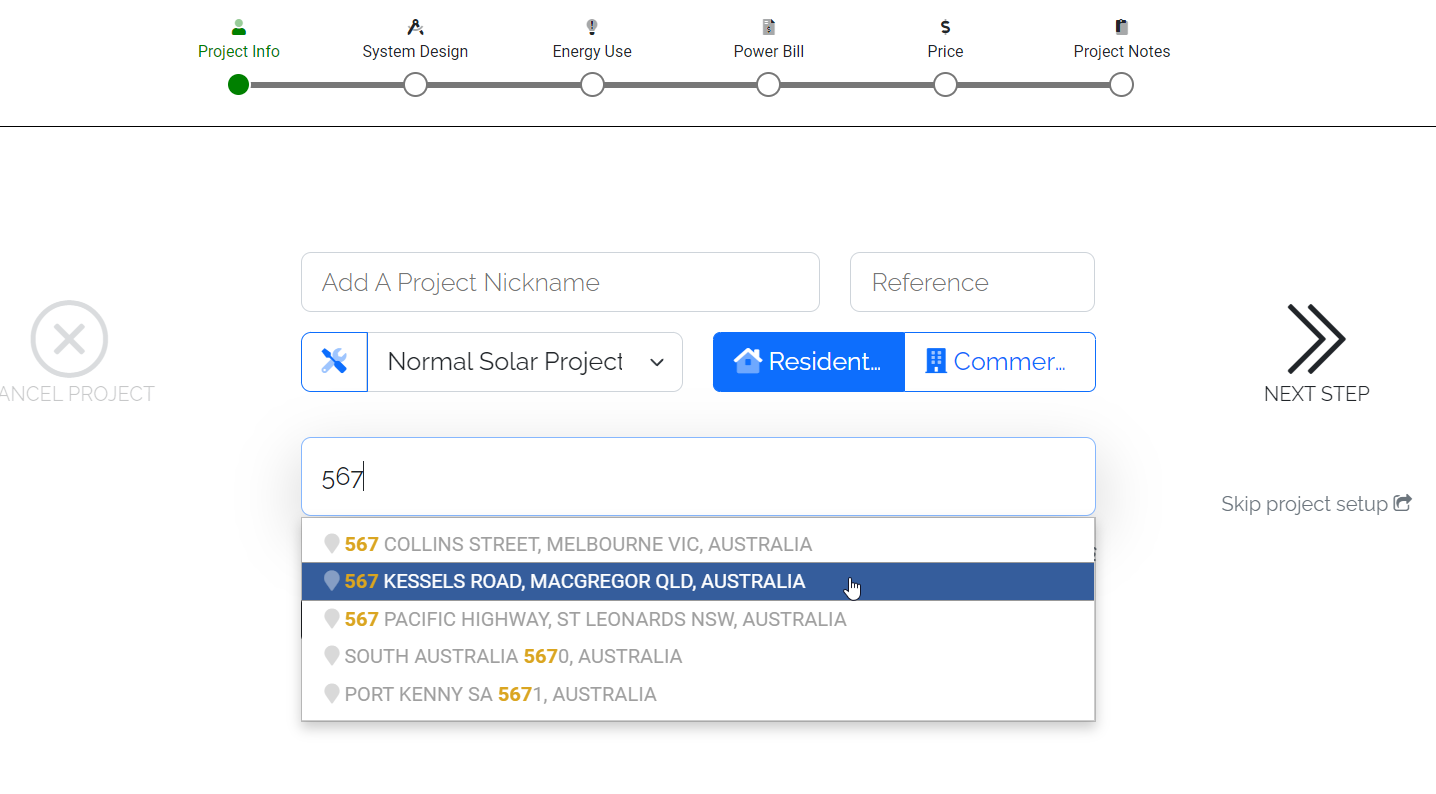
2. Enter the project address
Entering by address: To enter the address you can start typing the location and then click on one of the options that appears.
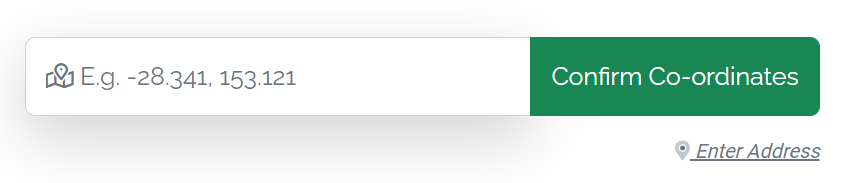
Entering by coordinates: To enter the address by coordinates (if not available by dropdown), first click the "Enter Co-ordinates" button

Then enter your Co-ordinates in the format latitude, longitude (eg. -28.341, 153.121) and click "Confirm Co-ordinates"
3. Design Your System (Not auto-price enabled - what's this?)
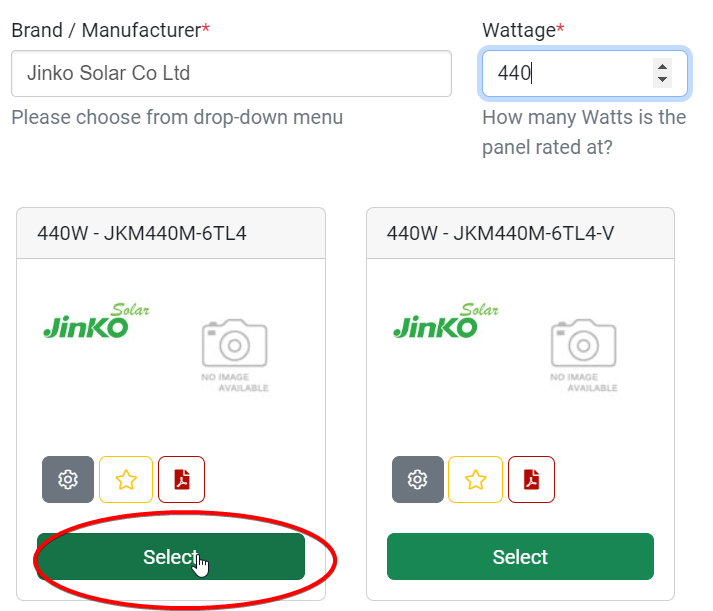
- Select a panel
To select a panel search the brand/manufacturer from the dropdown and enter the wattage you need then click "Select" on the model once found.
- Draw panels
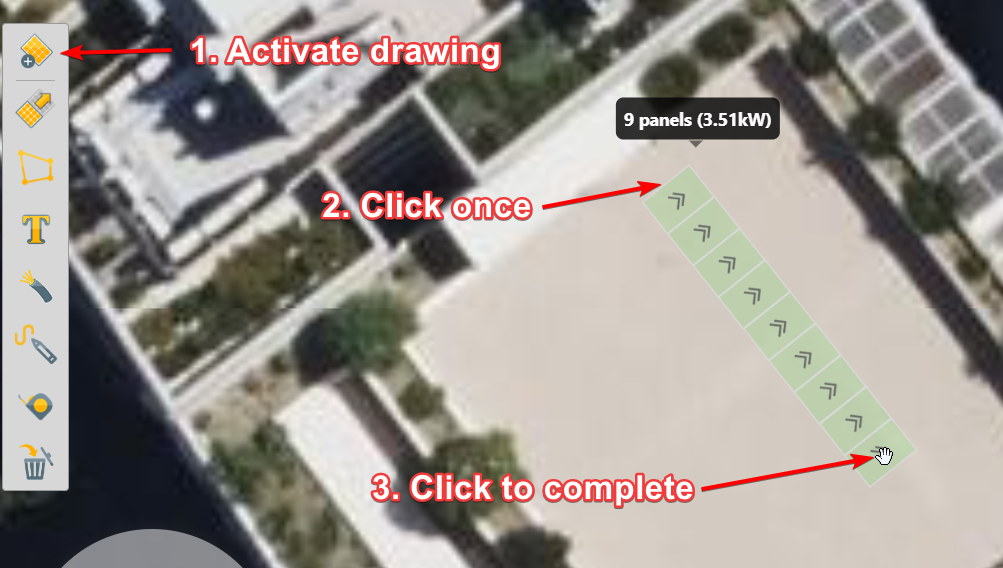
First activate panel drawing (top button on the left set of buttons).
Next click anywhere on the map to start drawing.
Finally, click somewhere else on the map to complete the drawn panels.
Note: the direction of the "caret" arrow markers on the panels indicates the "fall" of the panel (in which direction the panel is tilted - or which way water would run off the panel for example). So starting on the left and finishing on the right would create panels which face North, starting on the right and finishing on the left the panels would face South.
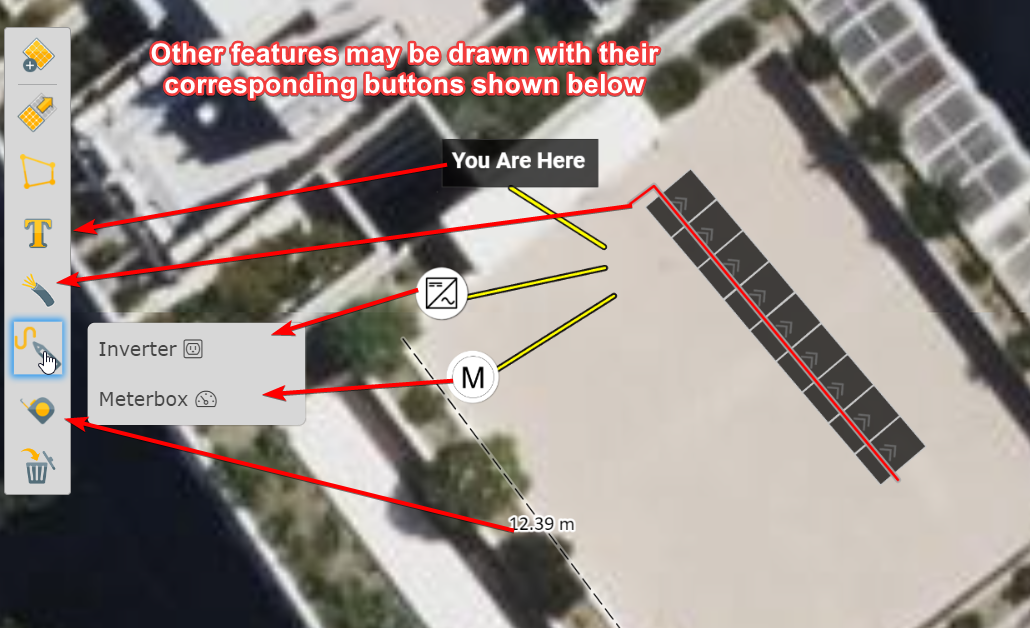
- Draw other features
You may draw other features such as Text Labels, Cabling, Indicator Symbols and Measurement lines
These can be drawn as shown below. For those annotations requiring a yellow indicator line, the first click sets the annotation location, the second click is the starting point for the indicator line and the third (final) click sets the end point for the indicator line.
- Complete stringing (if required)
A guide to stringing can be found here
- Select an inverter
1. Click the inverter icon
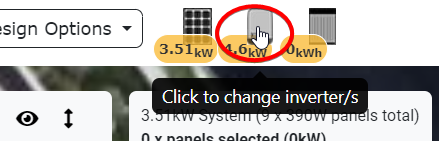
2. Click "Change" button

3. Same process as selecting a panel
- Select a battery
1. Click the battery icon
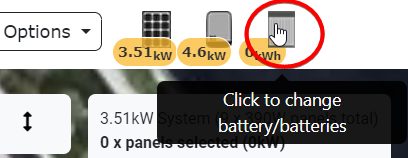
2. Click "Change" button

3. Same process as selecting a panel
More information on selecting products here
A comprehensive guide on the panel mapping tool is here
4. Proceed Through Creation Wizard